Wearable Quilt Patch

Transform your quilting skills into fashion with Wearable Quilt Patch. Learn how to create unique quilted blocks that can be added to clothing, bags, and accessories, blending your love for quilting with wearable art. I’ll cover design, construction, and application techniques, allowing you to showcase your creativity in a whole new way. Perfect for quilters looking to explore the intersection of quilting and fashion.


Supplies
Jean Jacket, Sweater, Sweatshirt, Long sleeve, or T-shirt (any size or fit you prefer)
Pieced quilt block (1" larger on each side than sewn surface area or jean jacket seams)
Fusible Cotton Batting (adhesive on one side, about size of quilt block)
Lite Steam-A-Seam 2 (a double-stick fusible web)
(1) Size of Quilt Block and (4) ¼" strips x width of block border
Thread (for quilting and sewing)
Favorites are Aurifil 50wt, 12wt, 8wt, and Floss
Sewing Machine (with walking foot or dual feed foot)
Scissors and Rotary Cutter
Cardstock or Tracing Paper (for creating a template)
Aurifil thread colors and weights from top to down: 2311 12wt, 4658 50wt, 2215 8wt, 2920 floss, and 1147 12 wt
Visual Learners
video coming soon… stay tuned
Step-by-Step: Wearable Quilt Patch
Part I: Preparation
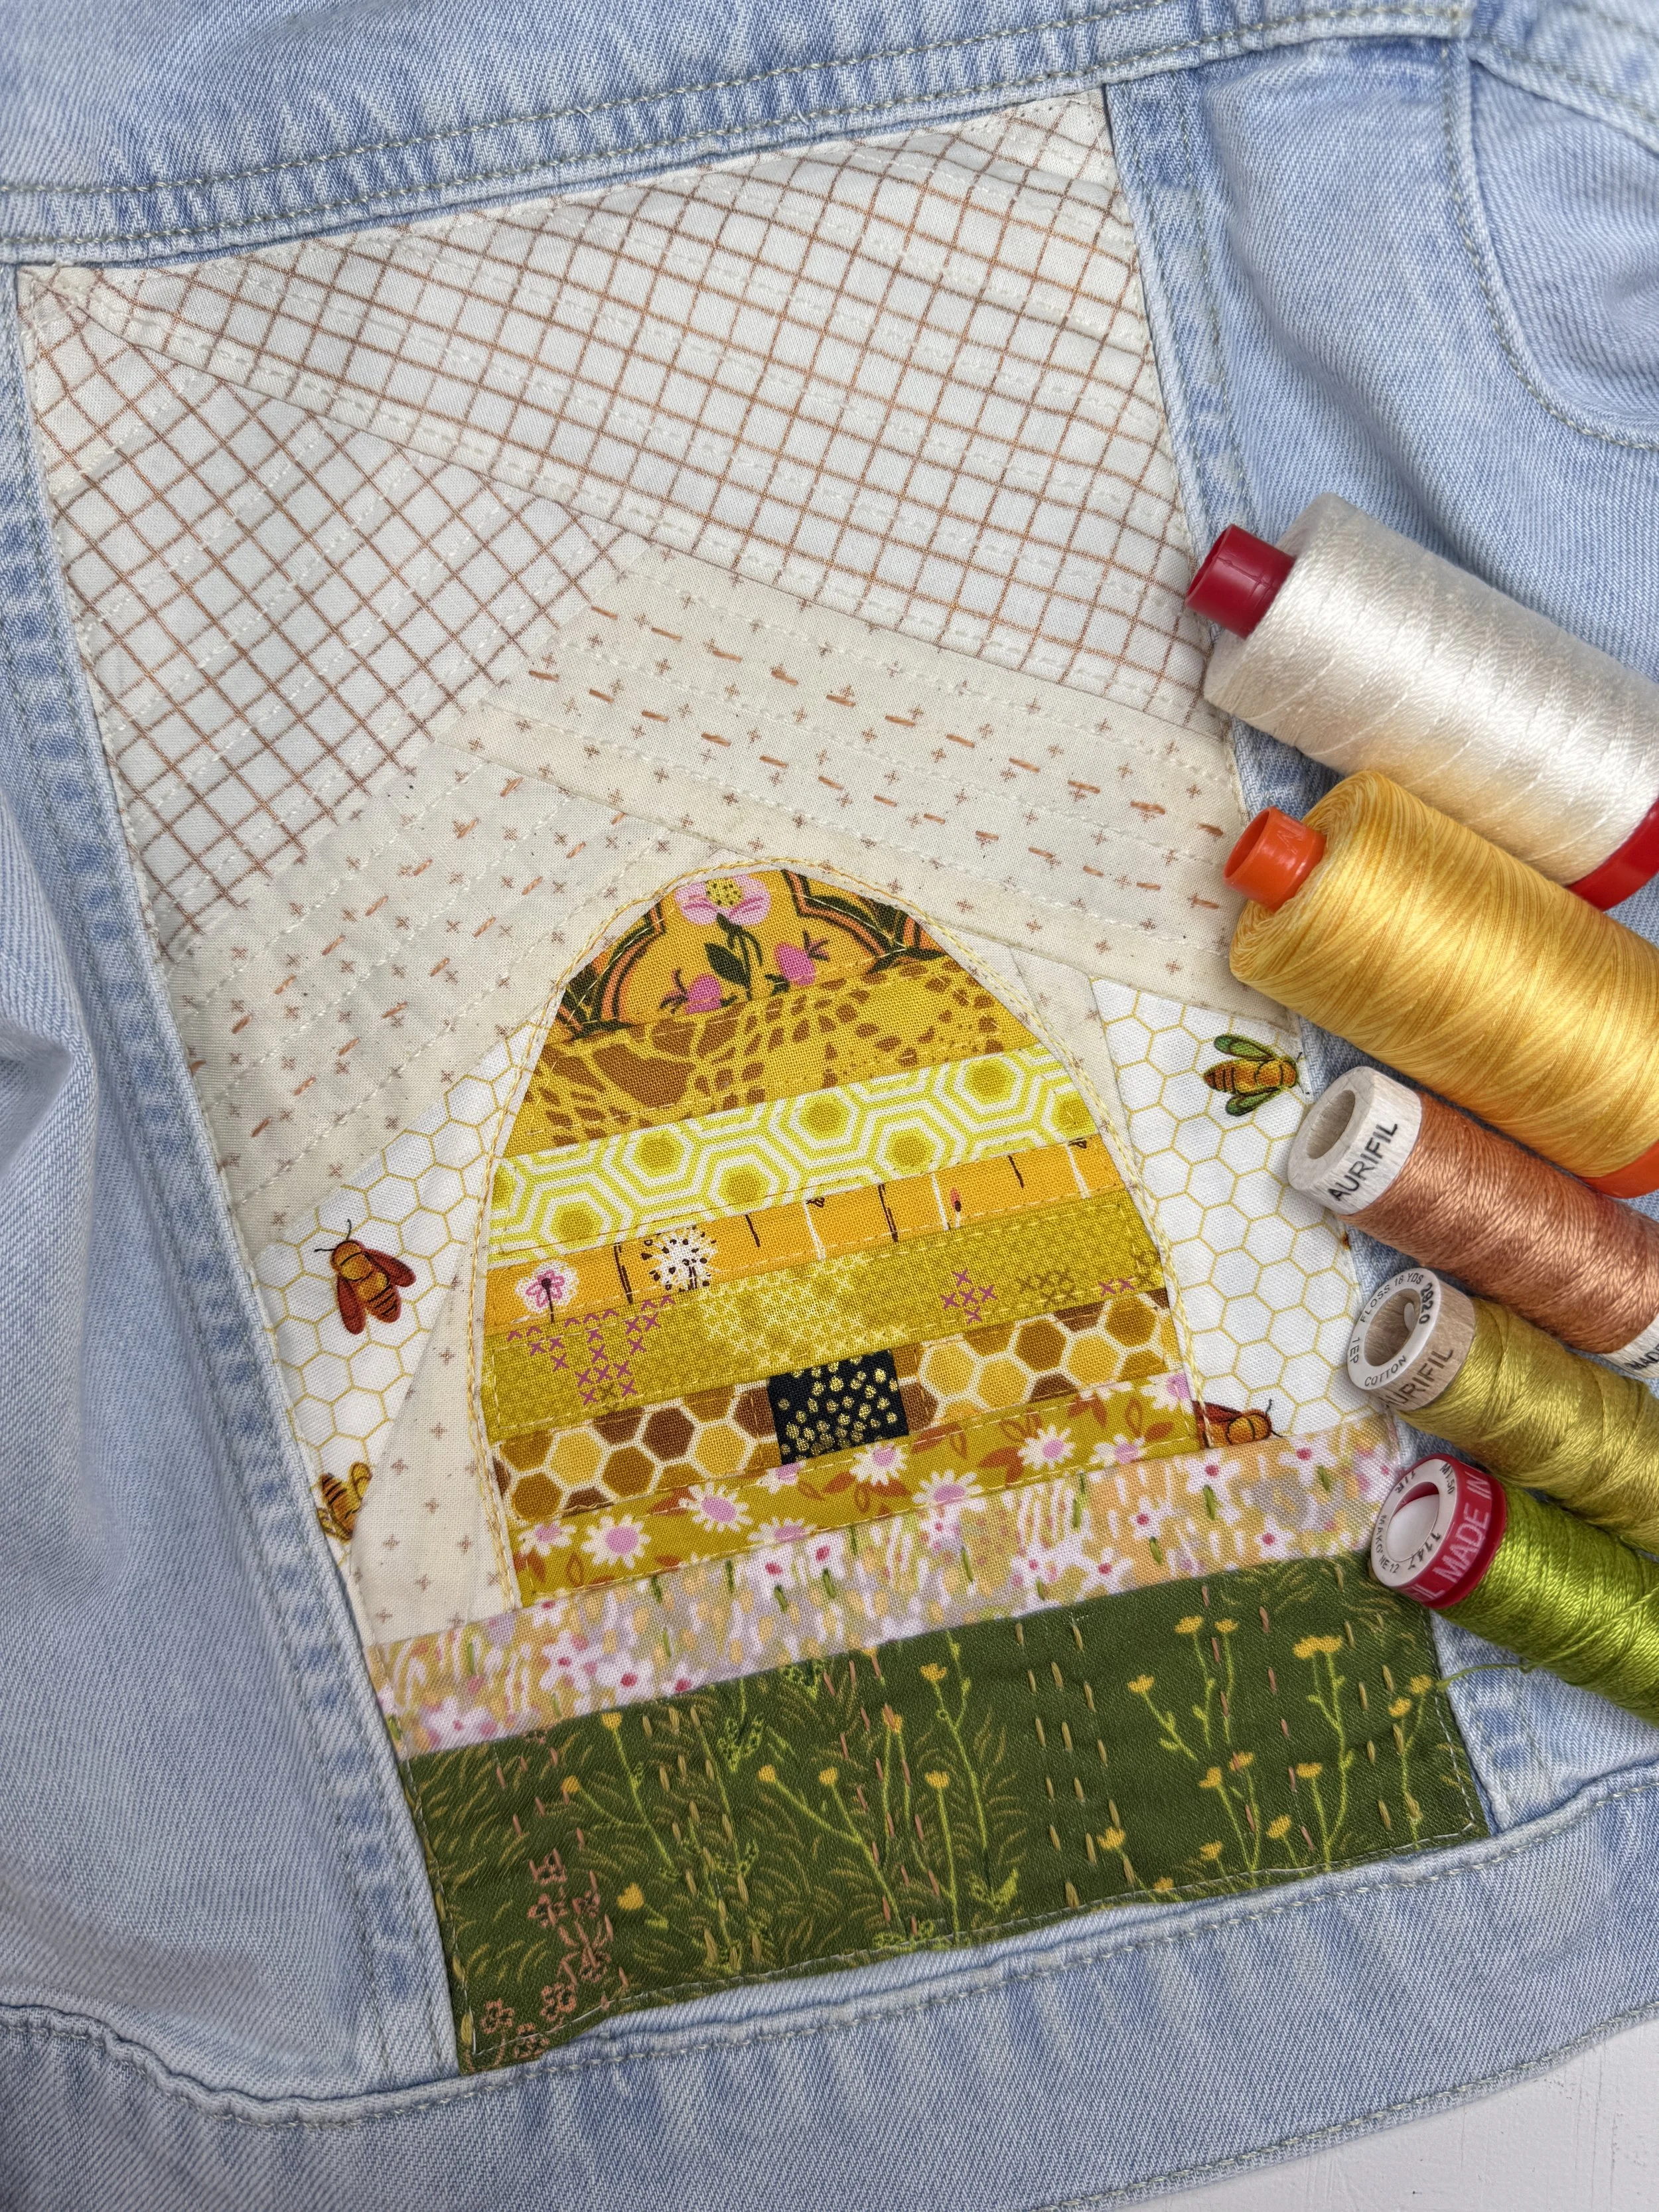
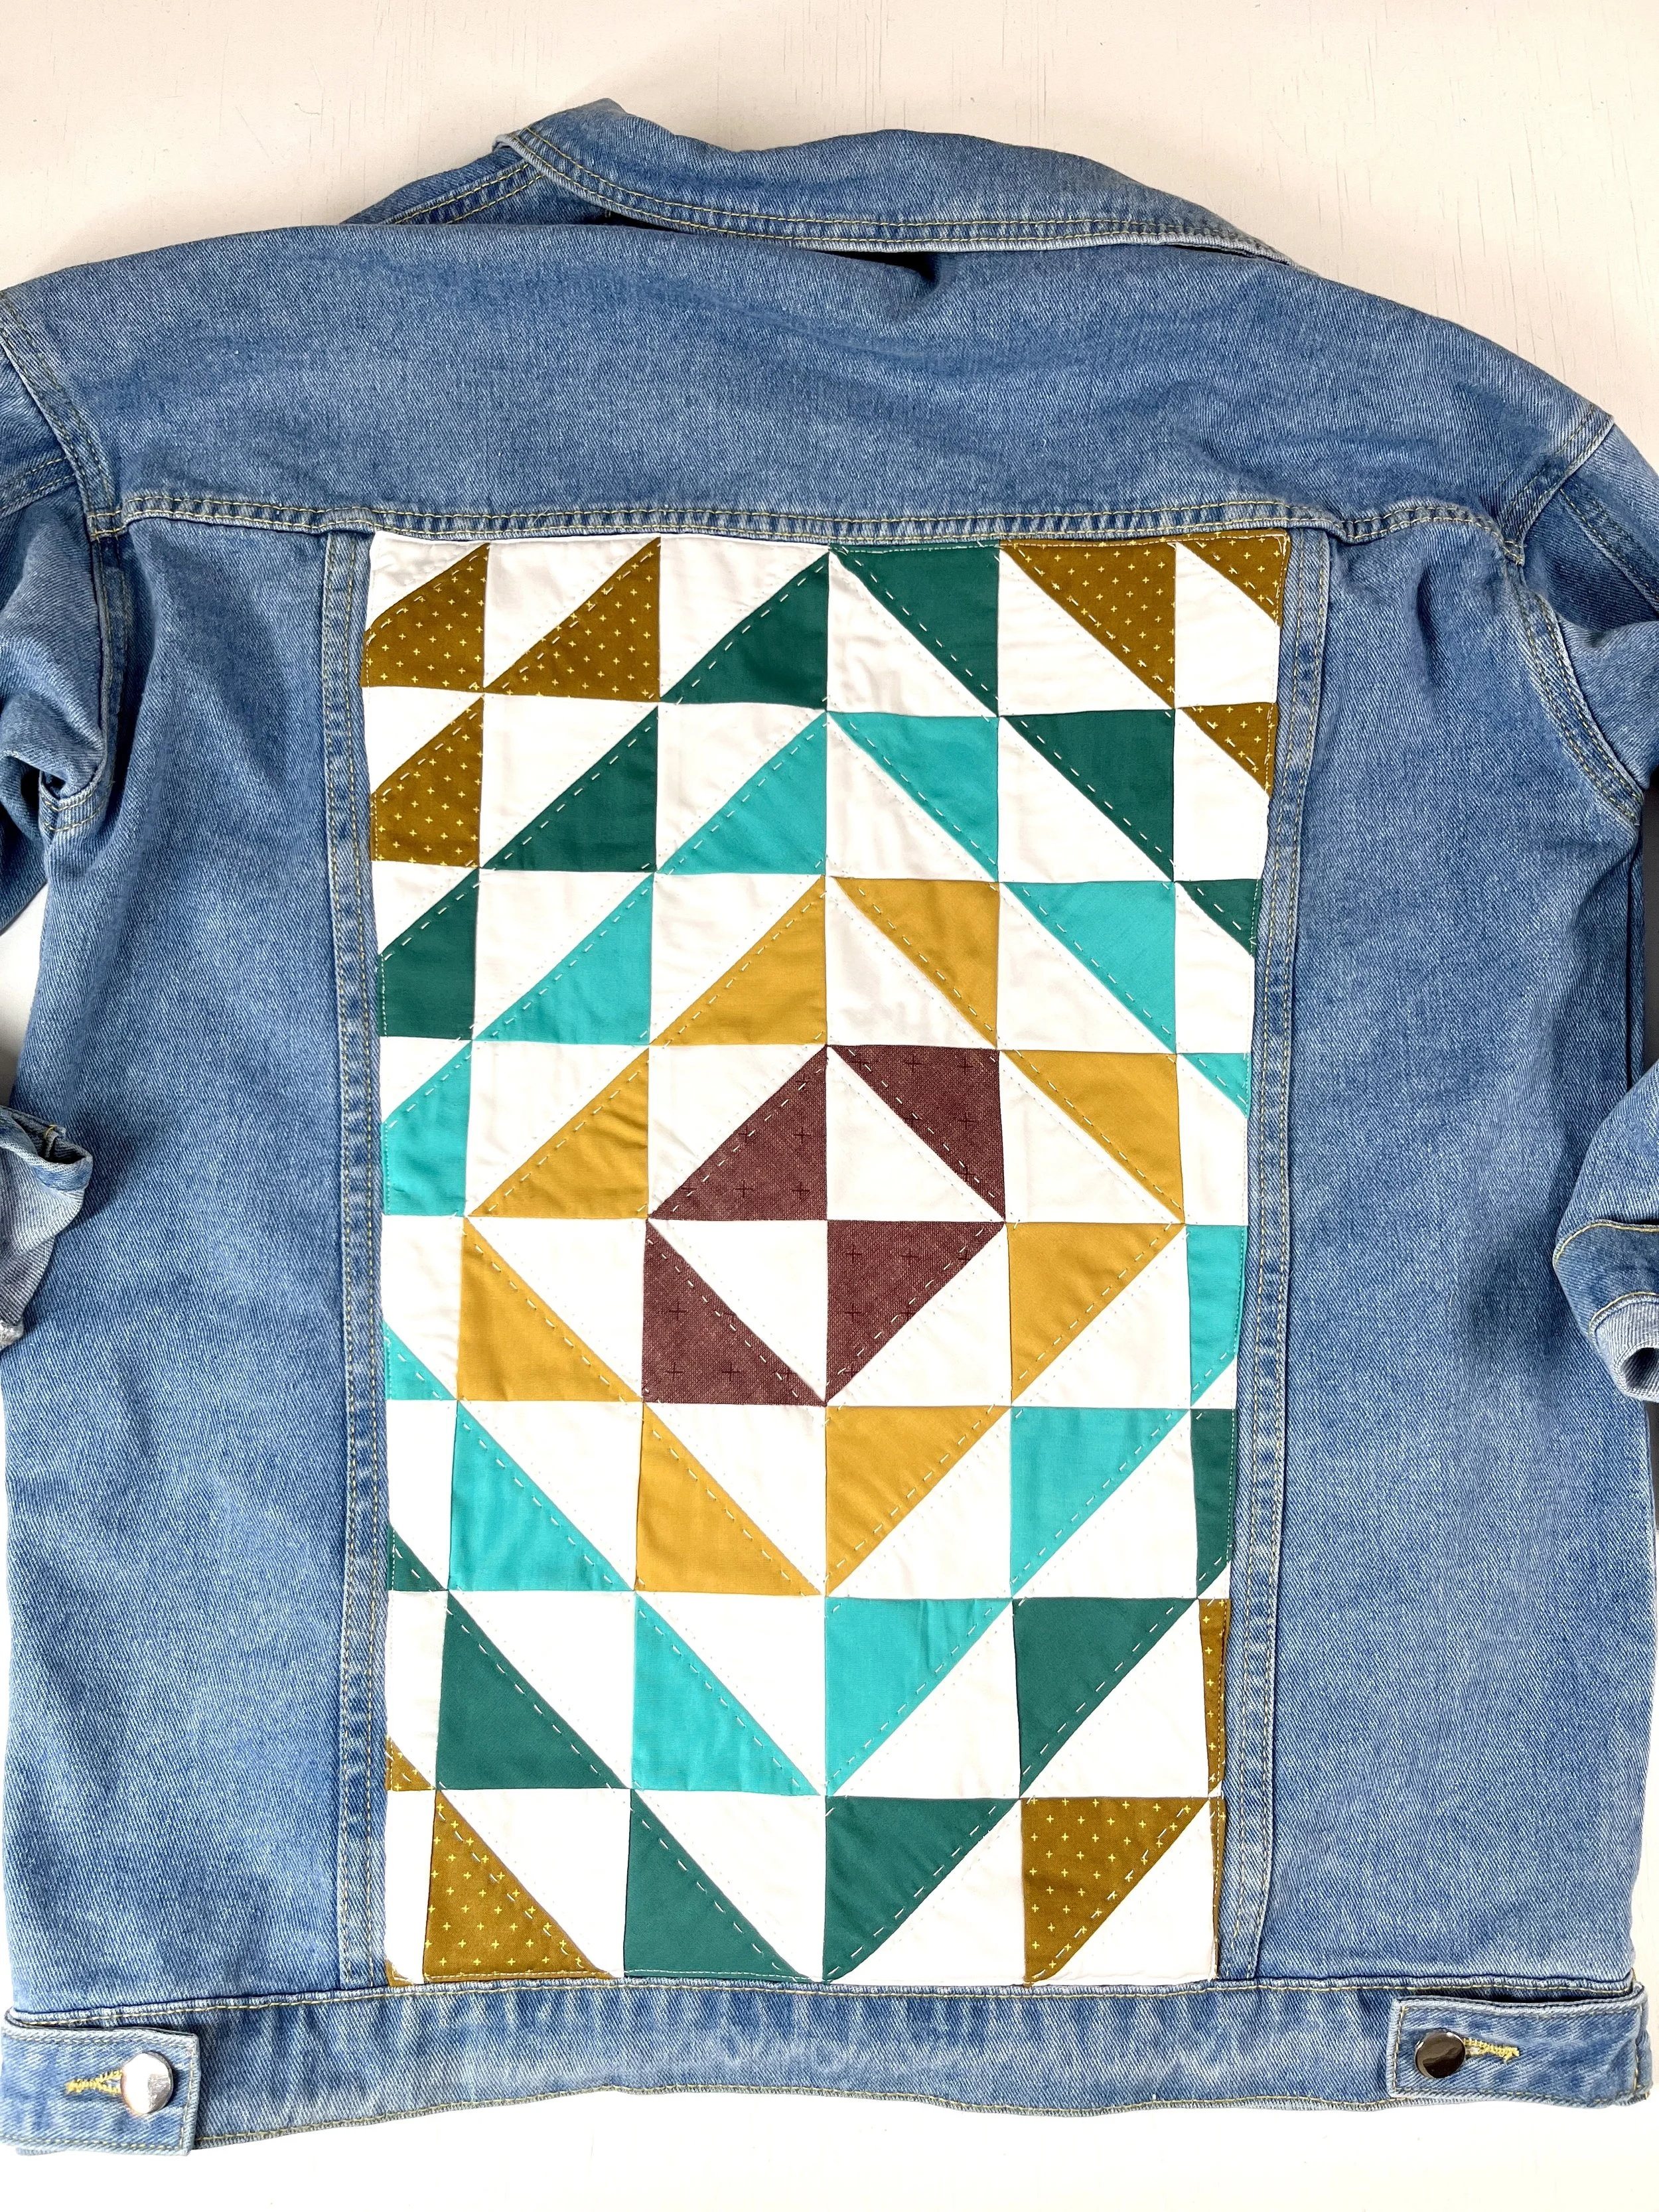
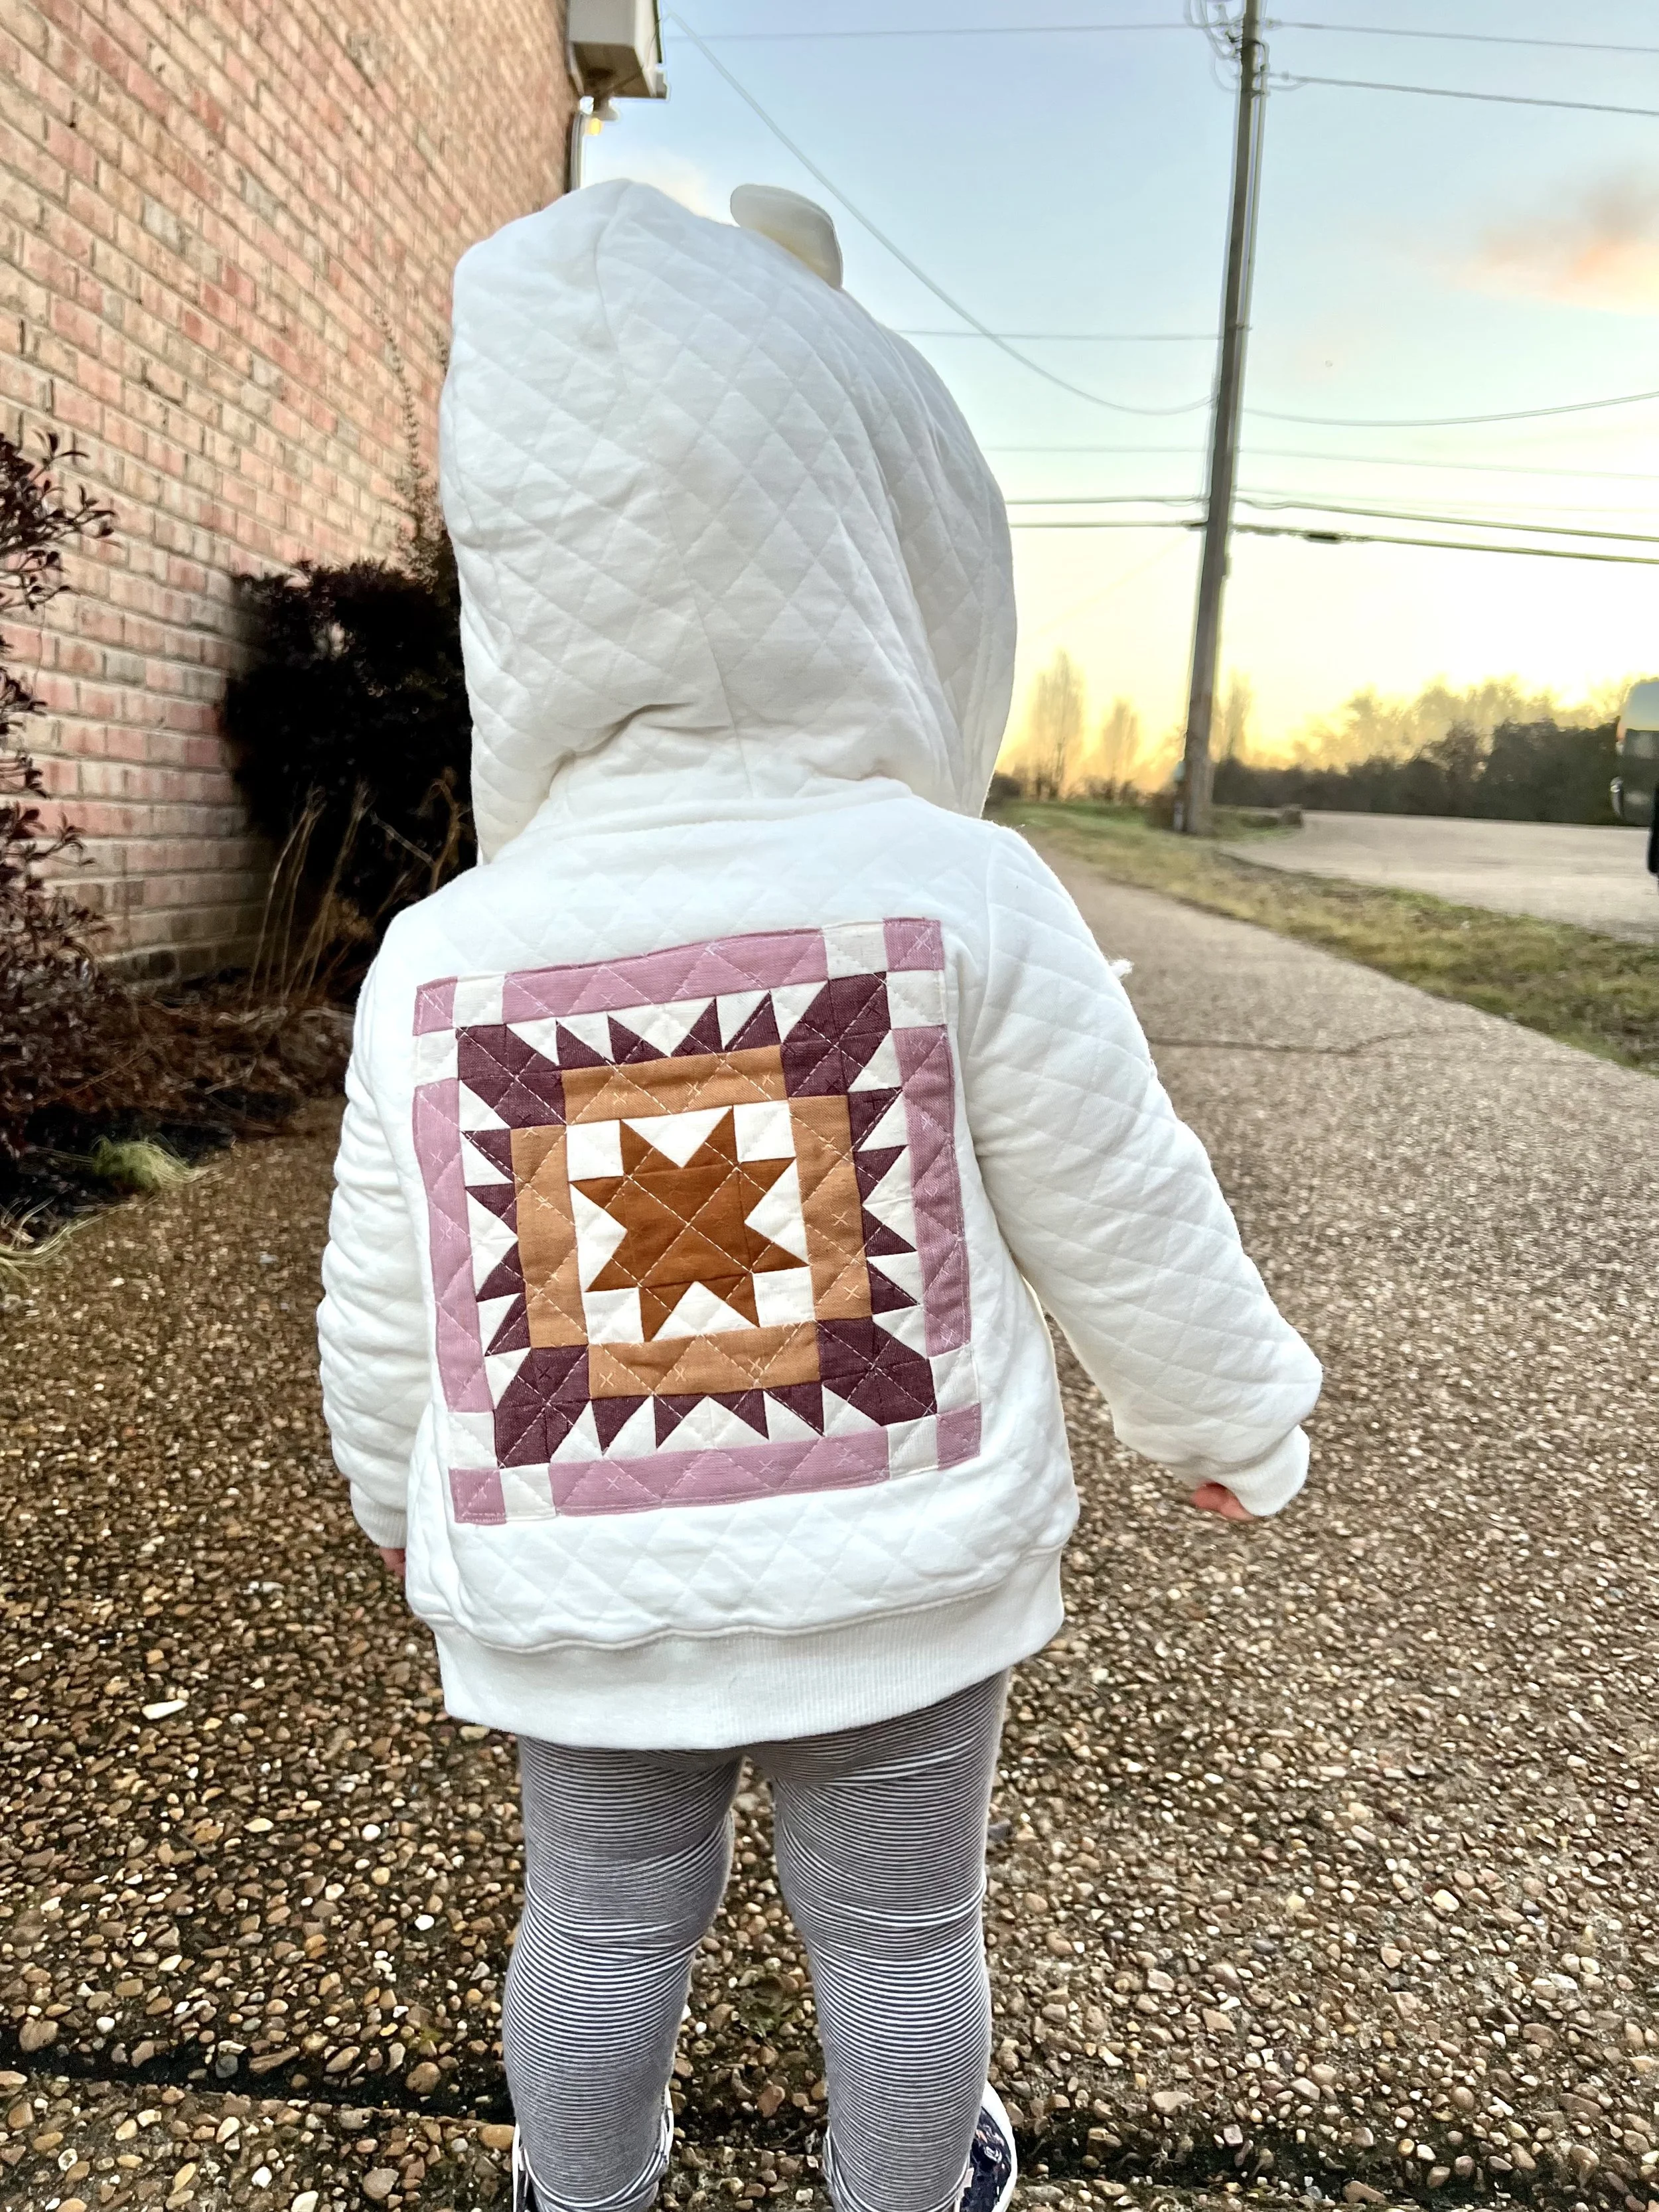
Decide which clothing item you’ll add your quilting piece to. If you’re using a jean jacket, I like the look when the block sits within the jacket’s seam lines, so choose a jacket with a good, flat panel to work with.
Have a pieced block or patch ready. Make sure it’s at least 1" larger on each side than the area you plan to cover (this gives trimming and turn-under room).
Part II: Create Template + Trim Quilt Block
This step ensures the patch fits neatly into the jacket’s seams. If you’re placing the block on a flat area (like a long-sleeve tee) and not setting it into seams, you can skip this section.
Place cardstock over the target area and trace the seam lines to create a template of the opening.
If one sheet isn’t big enough, tape sheets together. Perfection isn’t required—that’s why we leave extra and trim later.Cut the cardstock to size with regular scissors.
Center your quilt-block design, then—using a quilting ruler and rotary cutter—trim the block so it’s ½" larger on each side than the template. (Err on the side of leaving extra; you can always trim again.)
Part III: Quilt It
Select thread, prep your machine, and gather supplies.
Mark quilting lines on the block.
Fuse cotton batting to the back and press to adhere. Tip: to reduce bulk at the edges, cut the batting ¼"–½" smaller than the block on all sides.
Since the block is already trimmed, avoid heavy quilting right up to the raw edge.
Quilt by machine, by hand, or a mix and have fun.
Trim or bury any stray threads.
Part IV: Attach Quilt Block to Clothing
Press a ½" turn-under on all four edges of the block (or the amount of your extra). Use the template to confirm the finished size.
Test-fit the block in the jacket opening and adjust as needed—garment seams aren’t always perfectly straight.
Use ¼" fusible tape or narrow Steam-A-Seam 2 strips to hold the folded edges in place.
Fuse quilt block to jean jacket (or clothing) with Lite Steam-A-Seam 2:
Trace the patch shape onto the paper side and cut the adhesive slightly smaller than the shape.
Peel one paper liner and adhere the web to the back of the patch (batting side).
Peel the second paper, position the patch on the jacket (it’s pressure-sensitive and repositionable), cover with a pressing cloth, and fuse with a hot iron per package directions. Let cool.
Topstitch around the patch edge with matching thread, using a walking or dual-feed foot and a 2.2 stitch length.
Want more? I offer Wearable Quilt Patch as a workshop for guilds or quilt groups. Click here to learn more.
Want to support my work and try Aurifil Floss?
🧵 Shop through my affiliate link here.
Learn More from Zahm Co.

QFA is the ultimate course for quilters at any stage who want to master essential quilting techniques and tools. Whether you’re just starting or looking to refine your skills, this course dives into the basics and beyond, covering valuable tips and methods that even seasoned quilters may not know. QFA is all about creating a solid foundation to elevate your quilting journey.

This step-by-step course is ideal for quilters who want to dive into the art of whole cloth quilting. Learn how to create stunning quilts using just fabric, thread, and creative designs. With video lessons, a detailed workbook, and lifetime access, you’ll master this elegant technique at your own pace.

The Quilting Compass is more than a membership—it’s your guide through every stage of your quilting journey. As a member, you’ll gain access to exclusive downloadable PDFs, ad-free blog posts, and monthly content tailored to help you grow as a quilter. Whether you’re a beginner or an experienced quilter, The Quilting Compass ensures you always have the tools and inspiration you need to succeed.
And don’t forget to tag me @zahmco, I’d love to cheer you on.

Hello!
I’m Katie the designer and maker behind Zahm Co. Thank you for being here, I hope you find this blog helpful. For blog notifications, subscribe below!
Click the image to learn more about me.
xx